Lime plastering is a “must have” skill if you are contemplating the restoration of historic buildings. It adds to the aesthetic value and respects the original techniques used in the construction of many of our historic buildings.
The breathability of lime plaster complements traditional building techniques and helps to ensure that the environment inside a building is pleasant for occupation. The basic skills and tools used in plastering with lime are very similar to those found in modern plastering but there are differences that mean that lime plastering is now recognised as a skill on its own.
Generally lime work requires more time between separate coats and longer to fully harden. To completely describe the process and techniques would take this brief introduction beyond its intended scope but I hope the following photos and captions help with understanding the process and concepts.
We regularly undertake lime plastering either as part of a more in-depth repair or as a stand alone item of repair, if you would like us to assist with your lime plastering work please contact us here.
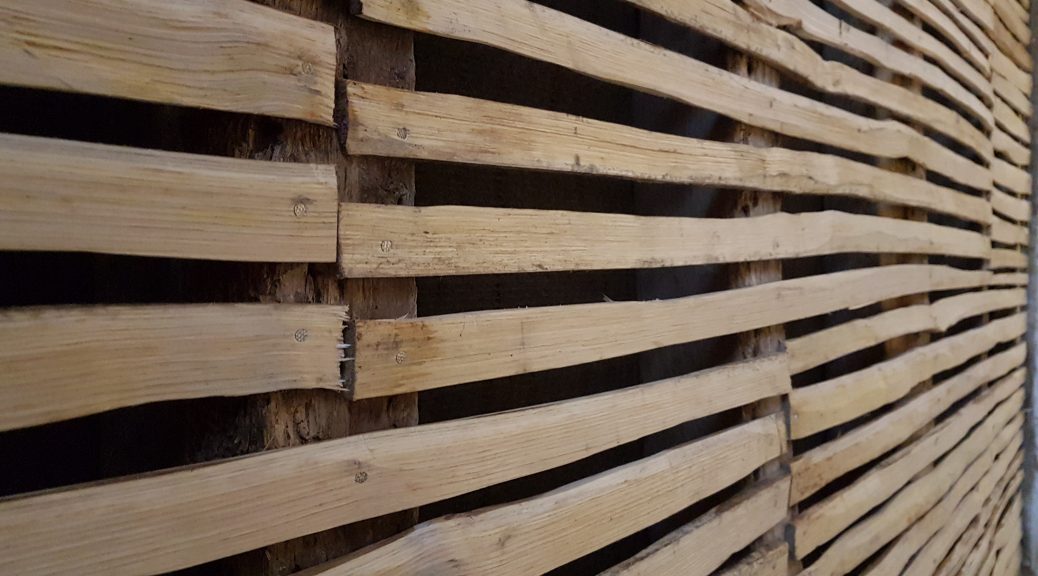
Split laths, these can be either oak or chestnut are approximately 32mm x 9mm, and about 1220 mm long. We fix them to the oak frame with stainless steel nails. It is extremely important that a gap of 6-12 mm is left in between each lath. It is the mechanical grip of the plaster that is squeezed between the laths that holds it on - there is relatively little adhesion to the face of the timber laths themselves.
Split laths are never straight or exactly the same dimensions! That's normal, and is part of what provides the charm of the finished plaster. It can be a challenge to keep the gaps between the laths the correct size, so if needed, don't be afraid to trim them with a knife. Once complete the room takes on an almost abstract quality.
Hairy lime! The addition of horse hair into a lime plaster mix is something that dates back centuries. The constant flexing and seasonal movement of timber framed buildings means that some reinforcement of the lime plaster is needed and horse hair provides the perfect answer. There are modern alternatives available but we only use horse hair. This is added slowly to the mix or else it won't spread evenly throughout the mix.
You can see the hairs on the edge of the trowel.
Applying the first coat, sometimes called the “scratch coat” On walls we work from the top down this ensures that the plaster is always pushed into the previous previous application when the trowel is pushed vertically up the wall. It's best to apply smaller amounts than larger ones and really push the plaster through the gaps - as we said above it's the mechanical grip of the plaster that is squeezed between the laths that holds it on.
Making progress, you can see the undulation in the 1st coat.
Laying on the 2nd coat on top of the heavily scratched 1st coat.
The 2nd coat has been applied and scratched up in preparation for the finish coat. Allowing the previous coats enough time to cure is part of the process - the only way to judge this is by feel and experience.
The finish coat has been applied and shows the characteristic white lime colouring.
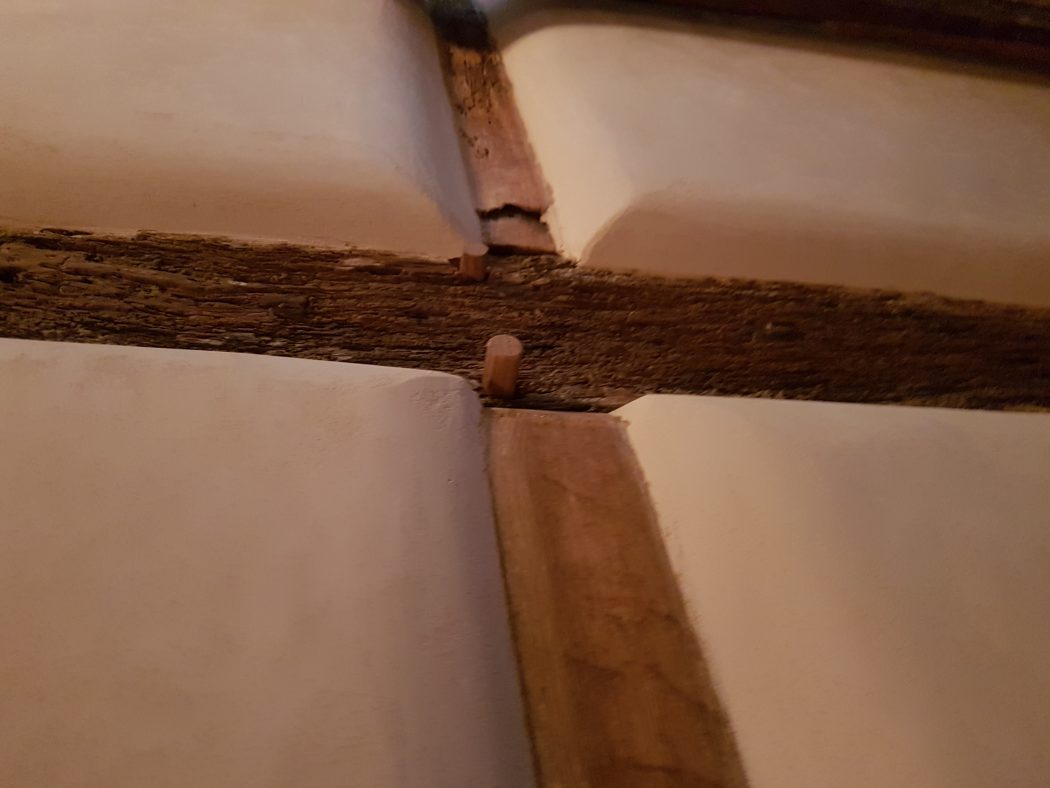
Here we have lime plastering to the inside of brick infill panels. The edges have been rounded to the face of the oak frame. Don't expect lime work on split lath or to the inside of infill panels to be flat, as it wont be! It should be smooth to the touch but undulating and flowing with the shape of the wall behind. This is the all part of the charm of lime plastering.