Category Archives: Uncategorized

Repointing In Lime, A Brief Guide

To point or not to point , that is the question!


It would be a mistake to assume that old weathered brickwork should be repointed. Contained within the often rustic appearance of old masonry are decades or even centuries of patination that identify the structure as historic. Without this weathered patination of age, structures would lose their charm and a great deal of aesthetic value.


Please don’t repoint old masonry just because it looks a bit tatty or tired. In my opinion repointing should only be carried out if absolutely necessary.


So long as the wall is structurally maintaining its function and keeping the inside dry, it would probably be best to leave well alone.


There are however times when repointing either a small, local patch or an entire wall is needed. If that is the case read on…


Please enjoy our brief guide to repointing in lime…

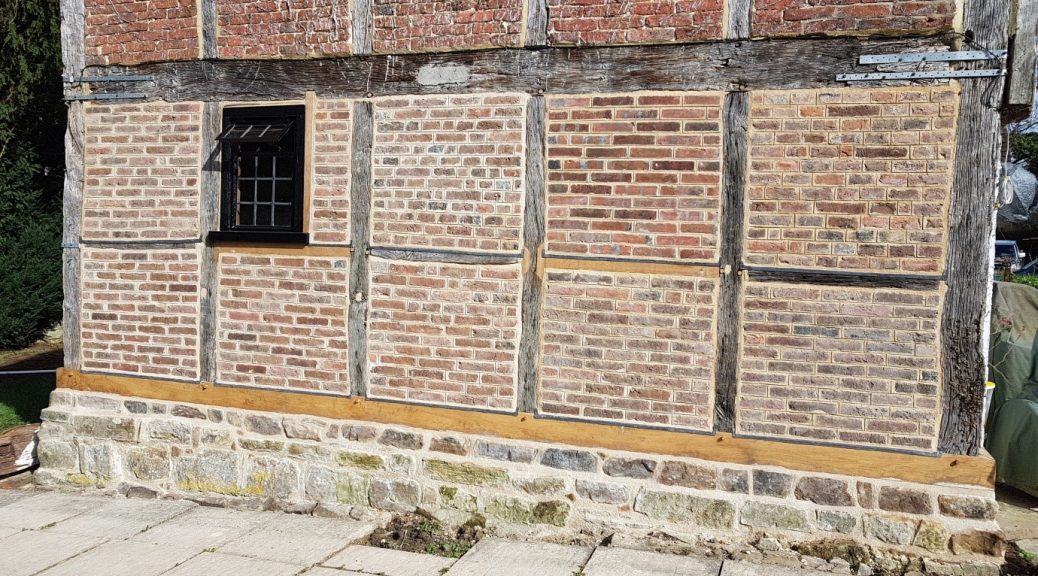
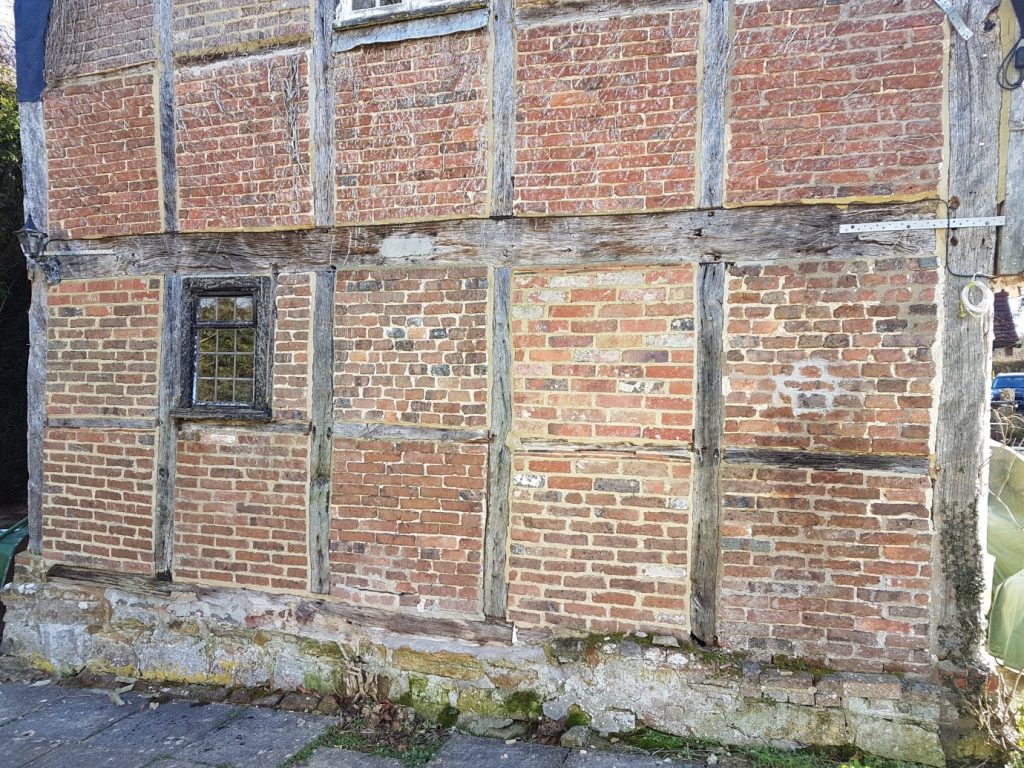
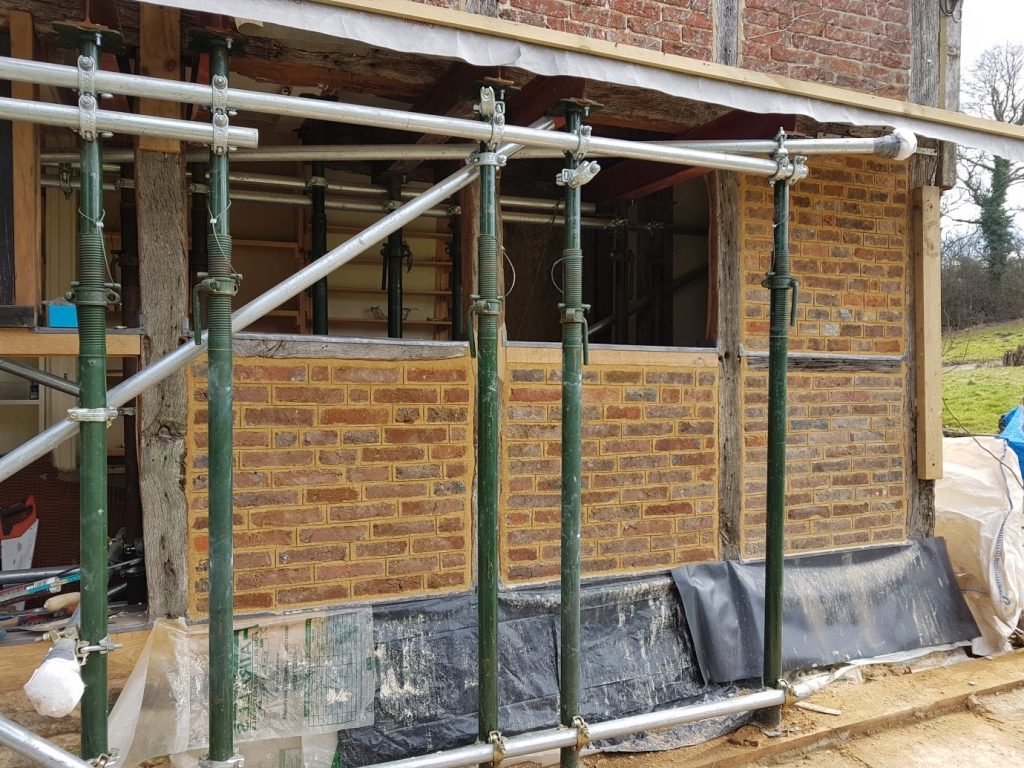
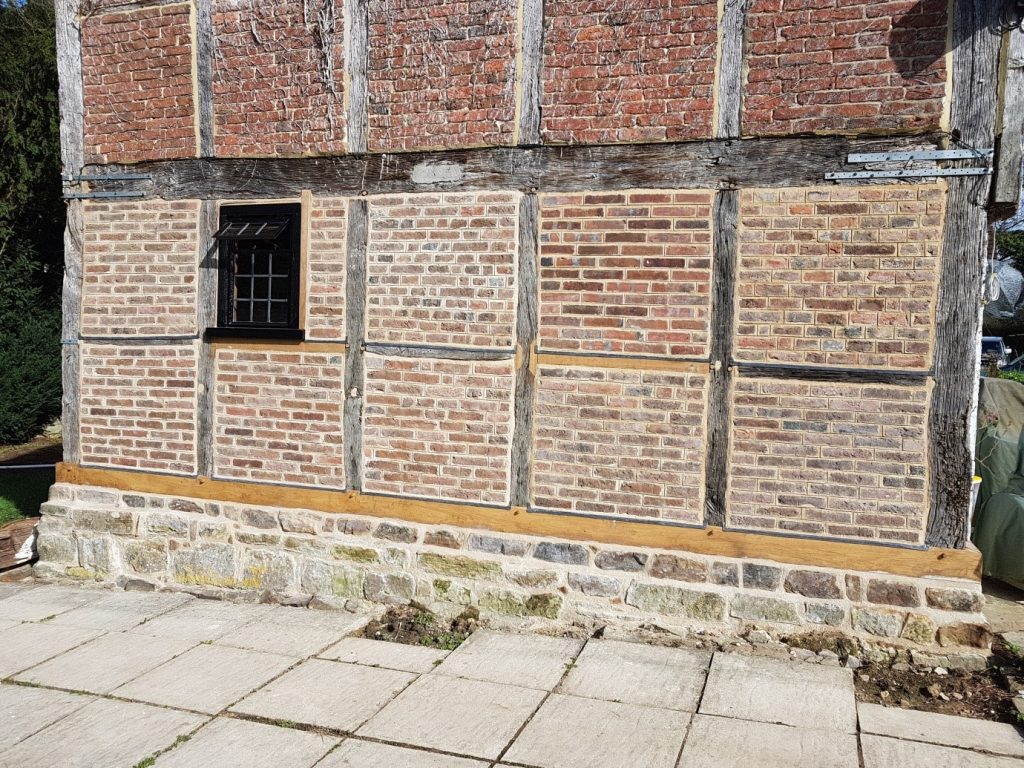
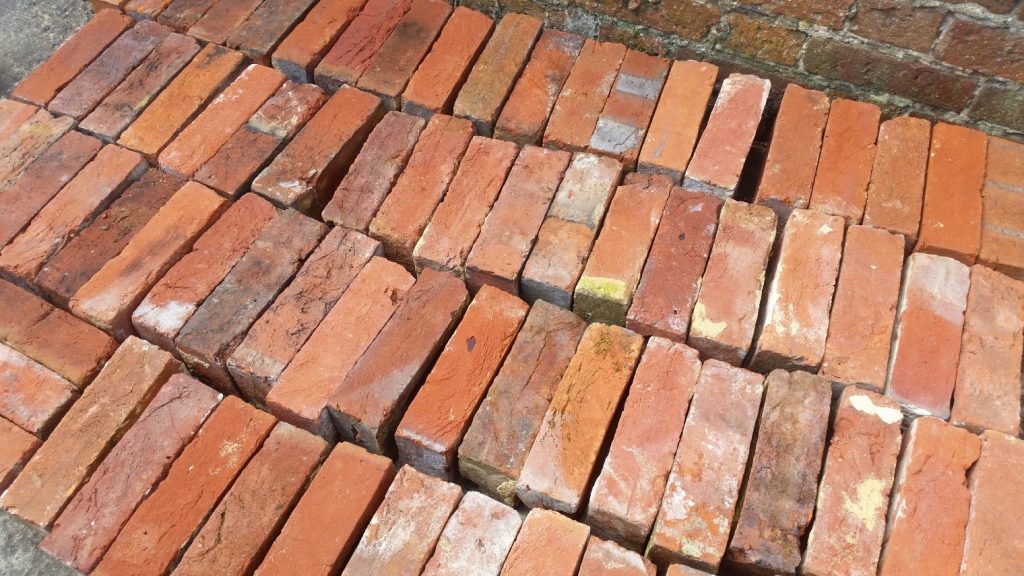
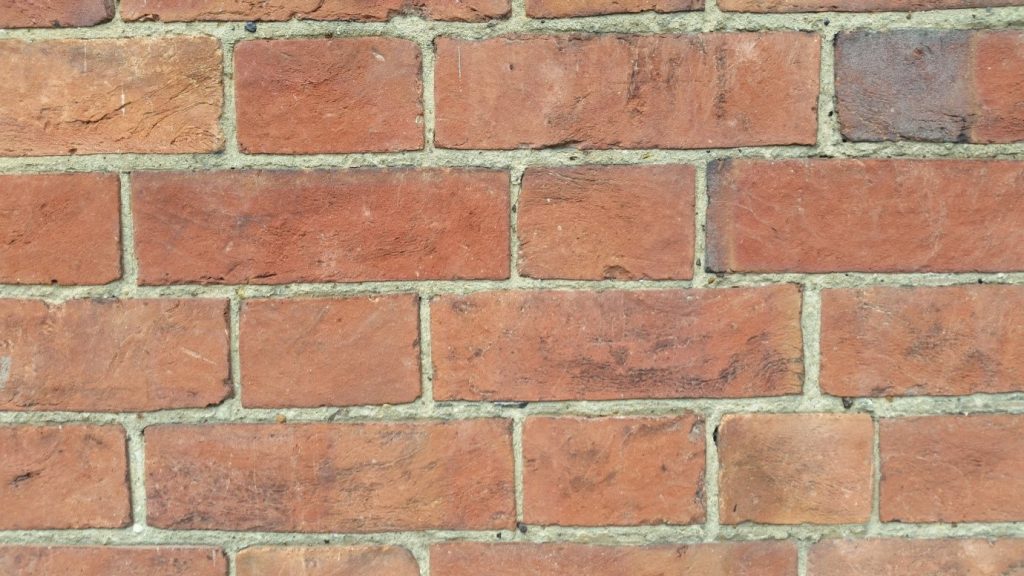
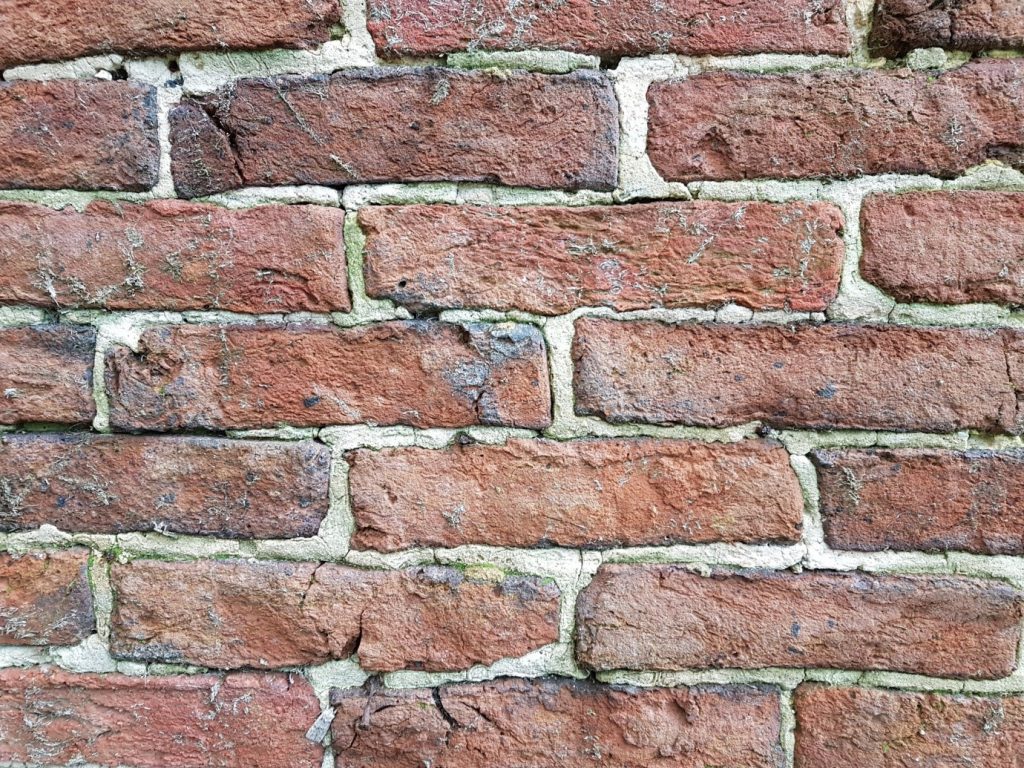
The two examples below show brickwork that is of great age has considerable weathering but is still functioning as intended; it therefore does not need to be repointed.

repointing in lime repointing in lime


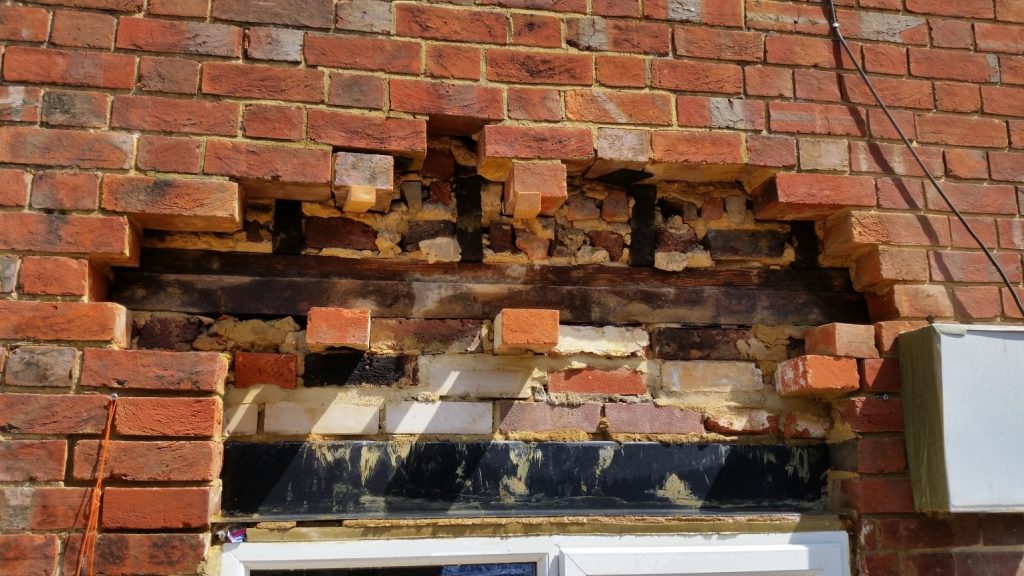
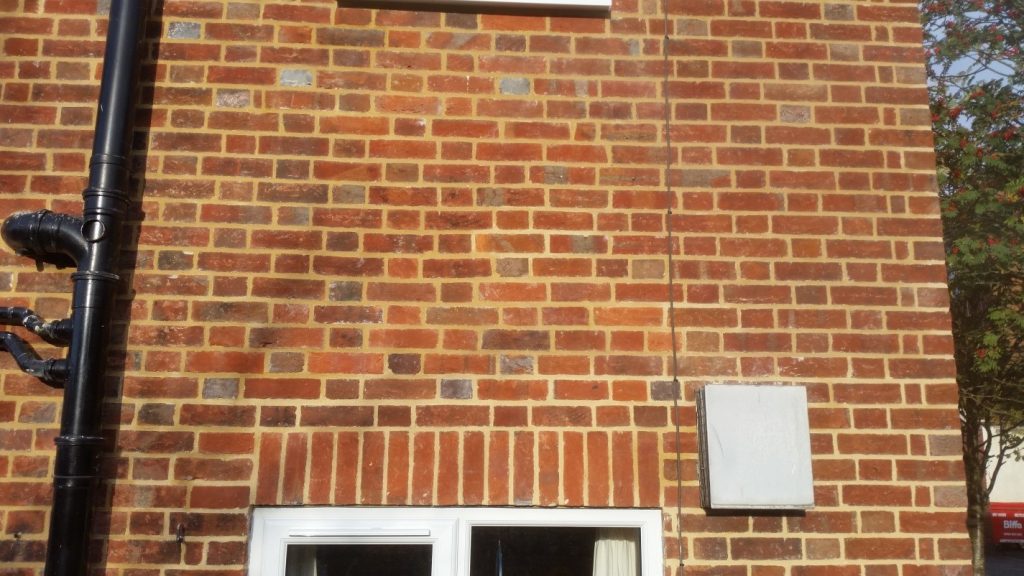
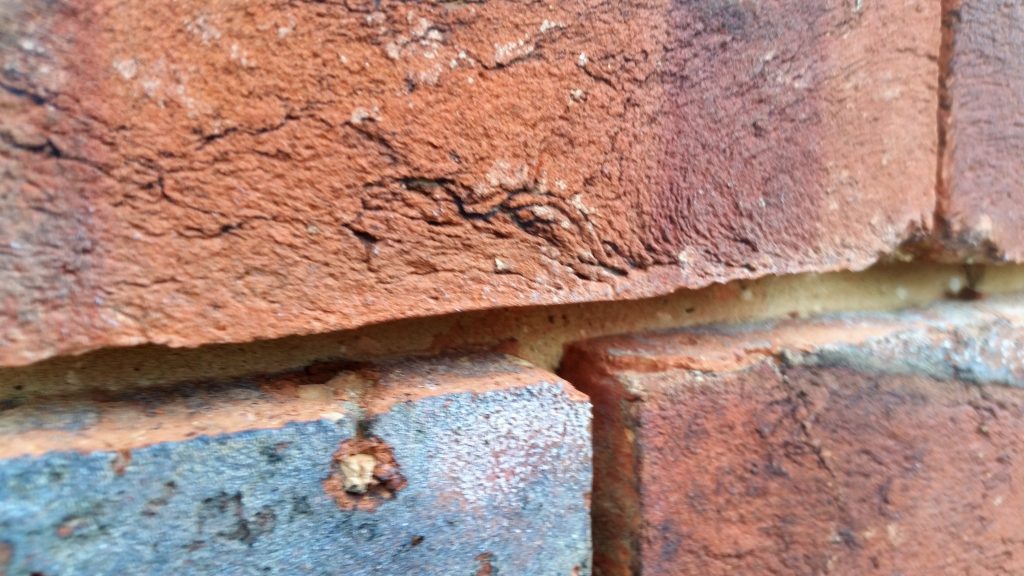
The example below however has been poorly pointed in a cement based mortar and leeks water. This should be repointed in lime.


repointing in lime


repointing in lime   repointing in lime


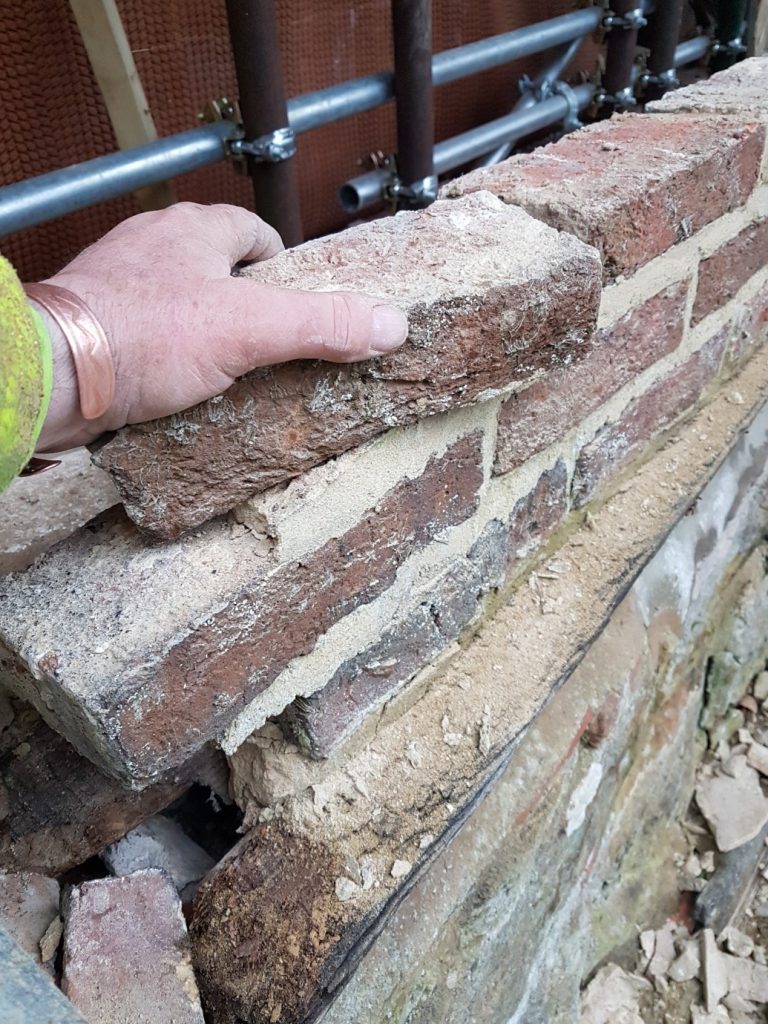
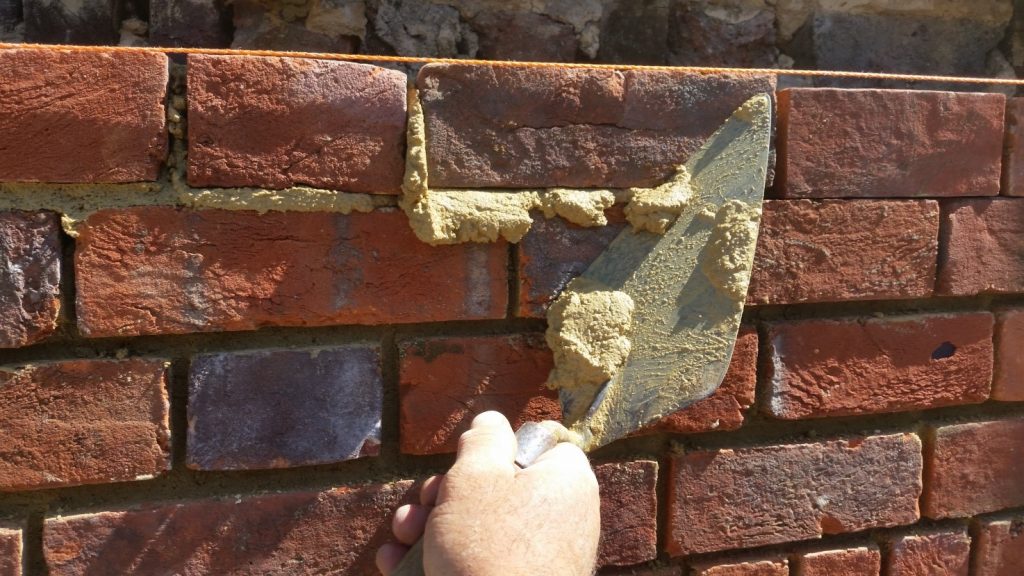
Once the decision has been made to repoint the first step is to remove the old mortar from between the bricks. This should be done carefully so not to cause damage to the bricks. I personally don’t mind the careful use of mechanical tools for this, what is important, is that the bricks remain undamaged. The examples above show what is needed. The traditional way was to ensure that joints are raked out to a depth equal or deeper than the joint width.

repointing in lime 7


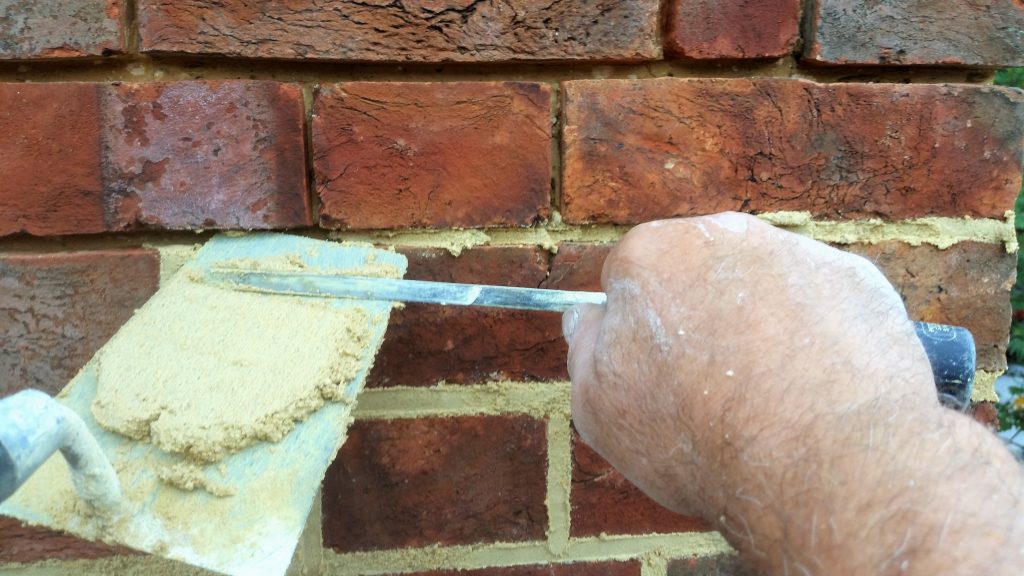
Once the joints are correctly raked out, the area should be thoroughly cleaned to ensure that there is no dust remaining. The bricks are slightly dampened with water before work starts. The perpends (vertical) joints are done first followed by the bed joints working over an area of about 1 square metre at a time. The mortar should be forced well into the joints. A well-practiced technique is needed to ensure that the brick surfaces remain clean.

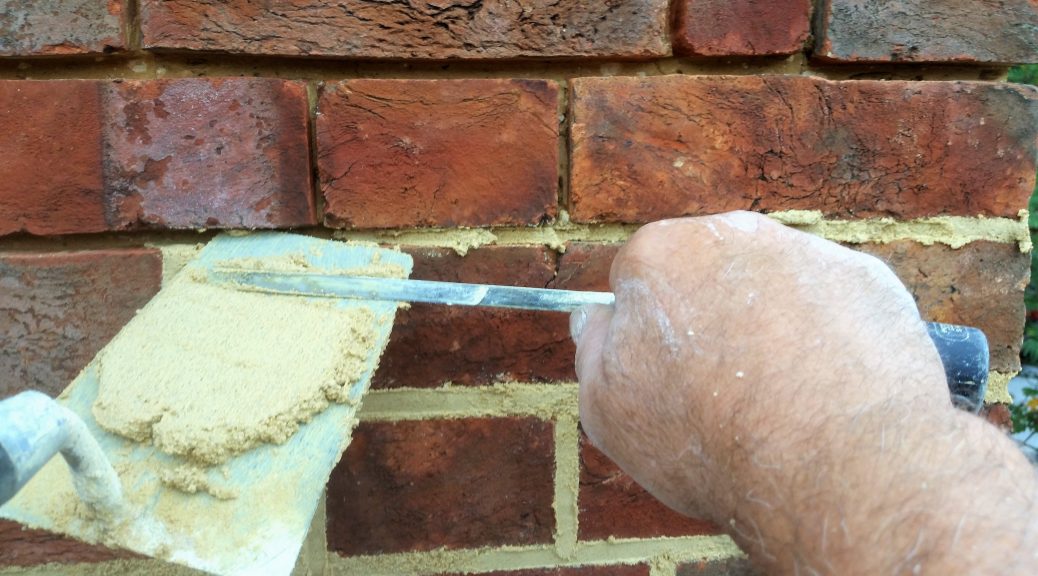
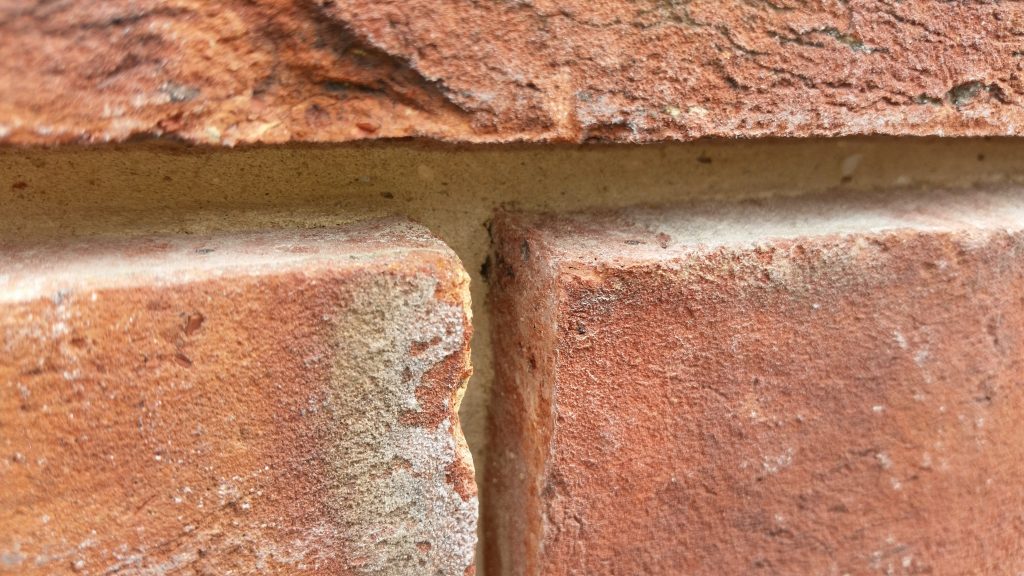
The choice of pointing style will probably be determined by the what was done when the wall was built. The example above will be completed in a quite formal “struck” style. The two examples below is what is known as “penny struck” or “penny pointed”


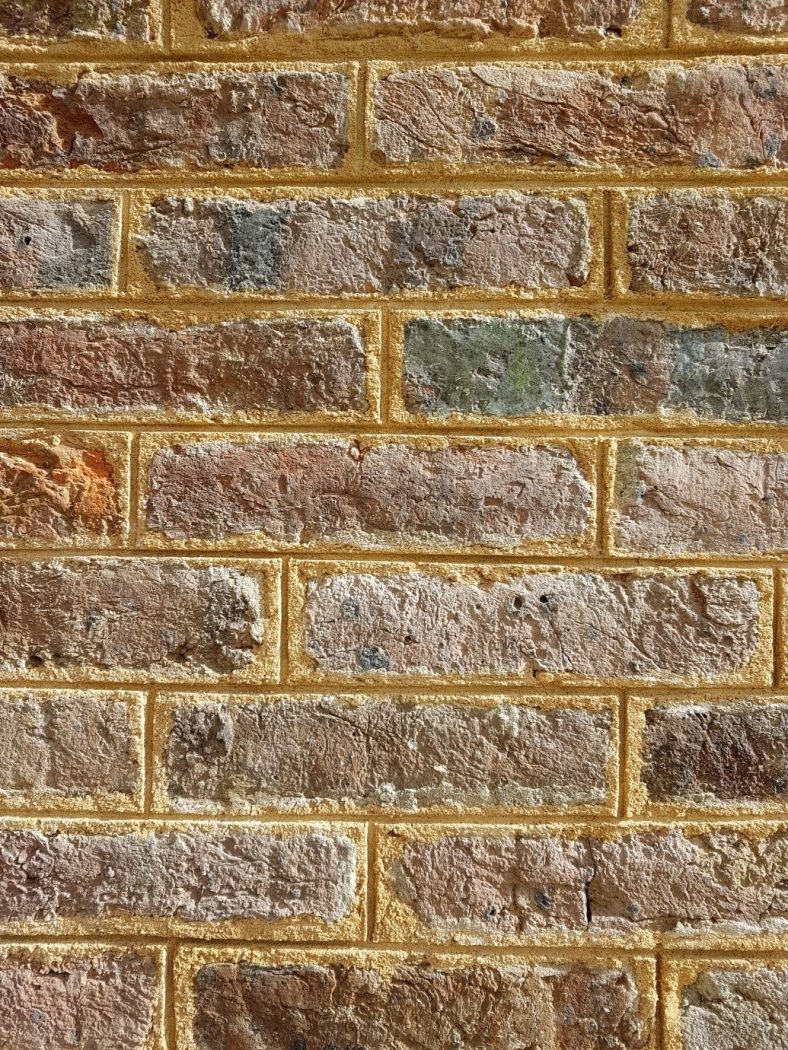
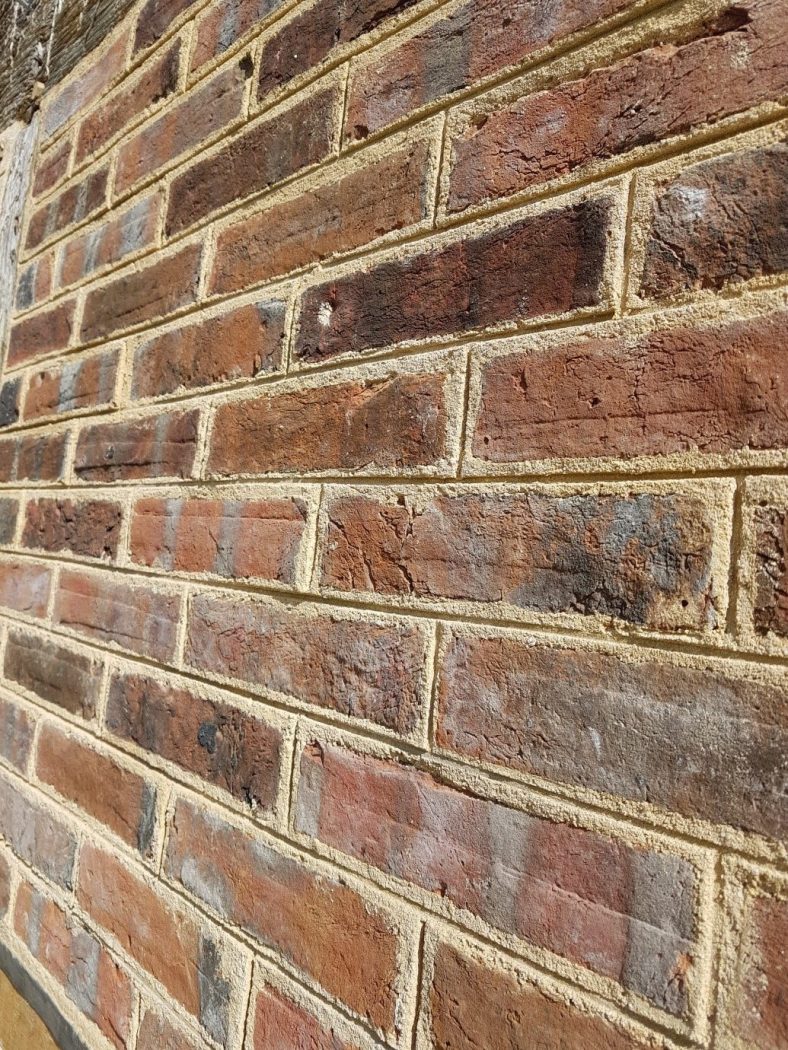
Historically the penny struck pointing style shown above, was extremely popular and was intended to make irregular bricks look more formal.

I hope this brief summary of repointing helps the reader understand the process, repointing is often carried out in conjunction with brickwork repairs click here for our step by step guide. Further information on our use of lime can be found here.

If you are looking to undertake some repointing to your property please do not hesitate to contact us here.

Timber Frame With Brick Panels & Sole Plate Repair Including Lime Plaster To The Inside

Farmhouse Near Lingfield Surrey

The repair of timber framed buildings is part of our regular workload. Although every job is different what we show below does represent a range of skills and tasks that when combined are representative of a fairly typical project.

Timber framed building repair London, Surrey, Sussex


The wall above shows many problems that are not represented well in the photo, these include

  • A sole plate that has almost entirely decayed away
  • Damp and water penetration through to the inside
  • Severe decay to some of the timbers
  • Modern brick infill to one of the panels
  • Four of the panels have been re-laid in cement not lime
  • Crumbling stonework below the sole plate
  • The lower 2m of this wall has a bow outwards of approximately 150mm


After consideration and consultation with the conservation officer it was agreed to completely dismantle the timber frame and associated 10 brick panels and embark on a total repair and restoration of this part of the wall.


Below is detailed how we went about the repair.


Timber framed building repair London, Surrey, Sussex

After thoroughly recording the historic features of the wall supporting needles and props were inserted these were well braced with (nice shiny) scaffolding.


Timber framed building repair London, Surrey, Sussex

Before knocking through, the inside was boarded off to provide security.


Timber framed building repair London, Surrey, Sussex

The brick panels are removed. Note the old historic bricks have been bedded in modern cement.


Timber framed building repair London, Surrey, Sussex

The almost completely rotten soleplate is removed, together with the remaining oak timbers.


Timber framed building repair London, Surrey, Sussex

The window is repaired and will soon be ready for refitting.


Timber framed building repair London, Surrey, Sussex

The oak timbers have been cleaned and repaired and will soon be ready to be fitted in place.


oak framed building repair London, Surrey, Sussex

The bricks have been cleaned and stacked. Note each pile of bricks is for the completion of each brick panel so all the bricks go back in the panel they came from.


oak framed building repair London, Surrey, Sussex

A large oak log is placed on the saw bench ready to be cut into a new sole plate.


oak framed building repair London, Surrey, Sussex

The new green oak sole plate is slid into position and wedged in place to test for fit.


oak framed building conservation London, Surrey, Sussex

The stonework is repaired under the new soleplate, all in lime mortar of course.


oak framed building conservation London, Surrey, Sussex

The brick panels are going back in, the polythene is to protect the stonework below.


oak framed building conservation London, Surrey, Sussex

The lime plastering is now complete.


oak framed building conservation London, Surrey, Sussex

All finished! The window is now fitted and decorated. The scaffolding is gone and cleared away. The new soleplate sits on repaired stonework. Some of the timber repairs can be seen and all will harmonise and age together over time.


A really enjoyable little project and one that illustrates the different stages and process of this kind of repair. If you have the need to undertake repairs of this nature feel free to contact us, we would be delighted to help.

Lime Plastering on Split Wooden Laths

Lime plastering is a “must have” skill if you are contemplating the restoration of historic buildings. It adds to the aesthetic value and respects the original techniques used in the construction of many of our historic buildings.


The breathability of lime plaster complements traditional building techniques and helps to ensure that the environment inside a building is pleasant for occupation.  The basic skills and tools used in plastering with lime are very similar to those found in modern plastering but there are differences that mean that lime plastering is now recognised as a skill on its own.


Generally lime work requires more time between separate coats and longer to fully harden.  To completely describe the process and techniques would take this brief introduction beyond its intended scope but I hope the following photos and captions help with understanding the process and concepts.


We regularly undertake lime plastering either as part of a more in-depth repair or as a stand alone item of repair, if you would like us to assist with your lime plastering work please contact us here.


Churches and Cathedral Work

Undertaking work on churches and cathedrals is a pleasure for us. The quality of the historical work in these buildings of worship is often extremely high and the standard of their repair and restoration is expected to match.


Some recent projects have included have included St Clement Danes, The Strand, Southwark Cathedral, London Bridge and St Philip and St James at Twickenham. We thought the following may help to illustrate our capabilities.

Case Study – St Clement Danes, The Strand, London


Church cathedral repair

We have been asked to repair various wooden structures inside the church on a number of occasions, these include the pews and staircase the six cherubs shown below and the four carved columns either side of the alter as also seen in the photo. This case study will illustrate our work to the columns.


Church cathedral repair Church cathedral repair


The carved capitols on the top of the columns were in a poor state, the glue had failed and large sections of them were at risk of falling off. Along with the columns all four were removed from their place in the church and transported to our workshop where we have the correct facilities for their repair.


Each capitol was dismantled, assessed for damage then repaired and re assembled.


Church cathedral rennovation

All Ready to be put back together. The process was the same for the remaining three capitols.


The columns:

Church cathedral rennovation

All four of the columns were transported back to our workshop where they were dismantled.


Church cathedral rennovation

Where needed the joints were strengthened.


Church cathedral rennovation

New timber was carefully fitted to the old and precisely shaped to fit. You only get one chance at this so it’s important to take your time. The columns were a lot larger than they appear in this photo!


Church cathedral rennovation

It is always a pleasure to use traditional tools, the wooden moulding plane above is nearly 100 years old.


Once the repairs were completed we refitted the items back in place. The whole process was of course arranged around the day to day activities of the church to minimise any disruption.


It is a pleasure and privilege to work on things of this nature I hope the above helps show what we are capable of, if you have the need for specialist repair work of this nature please feel free to contact us here.


Case Study – Brickwork Repair – Step By Step

Below is a typical step by step approach to repairing damaged brickwork. This example was one part of the total brickwork restoration of the rear elevation of a house in Dorking Surrey.

I don’t have a good before photo but take it from me, the previous builder (if that what he was) had made a horrendous job of things!

Enjoy our brief guide to a typical brickwork repair….


Historic brickwork repair surrey sussex london

Here we have removed the previous builders very poor attempt at repair. All debris and dust is cleaned away. You can see the horizontal wall plate and floor joist ends on the inside, these were inspected and found to be perfectly sound. The steel lintel remained in place and once the brickwork was completed we also replaced the window.


Historic brickwork repair surrey sussex london

We sourced the reclaimed bricks above, they are typical of the Victorian period and show colour variation from coal fired clamps. These will be cleaned and sorted before use.


Historic brickwork repair surrey sussex london

The bricks are laid to the correct brick bond in lime mortar, the top of each brick being kept in alignment by the use of a tight string line. You can see the bricks have now been cleaned and are free from staining and old mortar.


Historic brickwork repair surrey sussex london


Things are going well, nearly done…


Historic brickwork repair surrey sussex london

Ta da….Perfect…

The repair of brickwork may often be included alongside repointing work, click here for our brief guide to repointing, and further information on our use of lime can be found here.


If after reading this you would like to speak to us about brickwork or stone repairs to your property please do not hesitate to contact us here.